Classic Notes: How to communicate with IBM Connections from LotusScript wrapping IBM SBT with LS2J - Part 1
This part 1 of 3 in the article series “Classic Notes: How to communicate with IBM Connections from LotusScript wrapping IBM SBT with LS2J”.
Read the others here:
… embark! …
You have seen the cool IBM Social Business Toolkit (IBM SBT), and you played around with the ??bercool Playground application. You dive into the code and quickly discover that you need some Java or JavaScript knowledge.
- Ooops, but I am mostly doing LotusScript, you say … what now?
Perhaps you ask a question on StackOverflow to see if anybody has some advice for your scenario (just completely out of the sky – perhaps something similar to this question ![]() ). The chances are that you’d get a lot of advice abandoning your old and tired LotusScript in favor for the much more modern Java language. Your challenge is that you have a lot of LotusScript code that you would love to enhance with the new cool IBM SBT possibilities, and perhaps not the time to take the heavy plunge into learning a new language.
). The chances are that you’d get a lot of advice abandoning your old and tired LotusScript in favor for the much more modern Java language. Your challenge is that you have a lot of LotusScript code that you would love to enhance with the new cool IBM SBT possibilities, and perhaps not the time to take the heavy plunge into learning a new language.
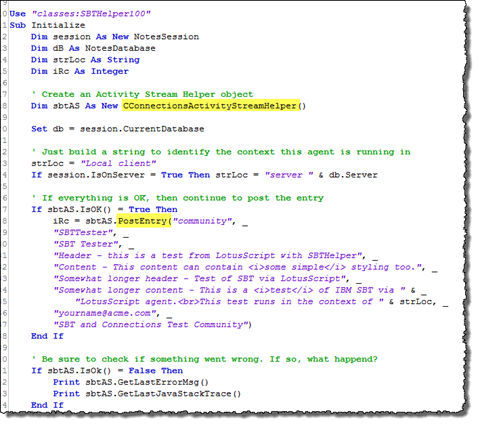
This article – which assumes a whole bunch of details are in place – will show you how to have this small piece of LotusScript code …
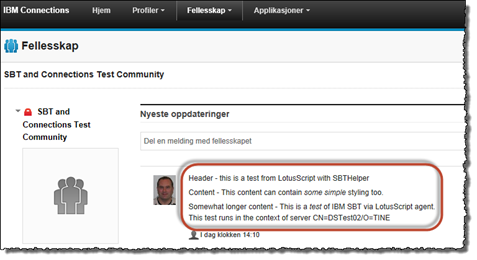
… put an entry into an Activity Stream in a specified community like this;
First things first. Why do I need this myself? We have a ton of LotusScript code, and several developers not familiar with Java nor JavaScript. They mostly work with LotusScript. My goal is to enable my LotusScript-colleges to communicate with Connections, by having some easy-to-use design elements that they can inherit into their databases. Right now I have two script libraries, the first being the primary LotusScript script library named classes:SBTHelper100 and another back-end Java script library named classes:SBTJavaHelper100. My colleges only need to pay attention to the first one in their code. Also bear in mind that the initial goal is to enable databases such as HelpDesks and Task-management databases to post activities to either community- or person activity streams. Future development will hopefully add enhanced functionality such as support for embedded experience so the user can solve simple HelpDesk-tasks directly inside Connections. This angle means that I can, via a super user id, act on behalf of any sender and post stuff to any activity stream I like.
This article aims at communicating with your on premises Connections server. I am using our Connections 4.0 server right now, but nothing should stop this approach from working on newer versions of Connections, such as release 4.5 onwards.
Secondly, you either need to be the administrator or having high enoughadministration-rights on both Connections server and on your Domino server to get this stuff to work.
Create a user id with trustedExternalApplication-role in Connections
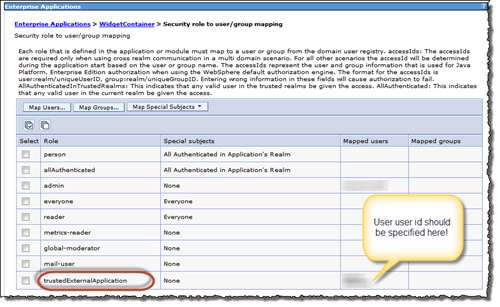
Before you do anything, you should have your special user id with the trustedExternalApplication-role created in Connections. Enter the Connections server’s WAS console and open up Enterprise Applications -> WidgetContainer. Select the Security role to user / group mapping, and ensure that the role trustedExternalApplication has your special user id specified. below you see what the console looks like on our server;
This change enables the special user id to act as anybody and allow the user id to write data anywhere. In the rest of this article I will refer to this user id as superid .
Download and install Eclipse
What!!! I hear protests already - wasn’t this an article without the need to learn Java?!?! Yes, you can skip this if you don’t want to be able to develop and test your Java-code locally in Eclipse. You can even use Domino Designers ability to debug Java code too, which is actually Eclipse-based behind the scenes.
I very much like to be able to develop and debug the code in Eclipse, which I find to start debugging much faster than Domino, and also gives me direct access to all the SBT code for debugging purposes. Remember that we you have set up your Eclipse project and the initial Domino code, you can simply copy the java-files between Eclipse and Domino.
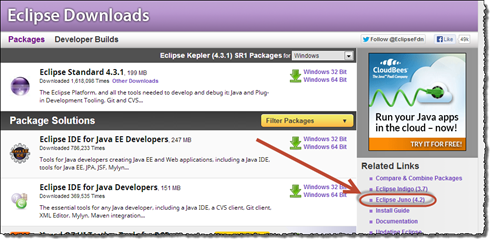
Head over to the download page at Eclipse.org You’ll see that the latest version of Eclipse at the time being is named Kepler. I have not tried Kepler yet, so I downloaded Juno install (probably because a lot of presentations told me too, not because I could …)
I ended up with the Eclipse IDE for Java EE Developers as shown below;
Install Eclipse and see if it starts up as it should (meaning no error messages at startup).
Download and install SBT
Head over to the SBT-project homepage on Openntf.org. Follow these steps to get it all in place on a Windows 7-machine.
- Unpack the zip file to some relatively short directory name (I like C:\Data\Eclipse\SBT-blabla, and at the time of writing I have the November 1st version of SBT. The directory is therefore C:\Data\Eclipse\sbtsdk-1.0.0.20131101-1513).
- When finished, open a Command Prompt (CMD.EXE) and place yourself into the sbtsdk-subdirectory, like shown below;
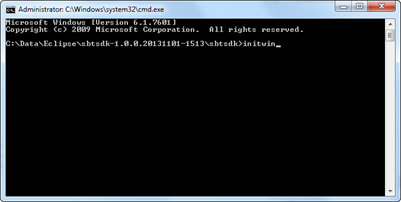
Issue the command initwin. This will first and foremost create a so-called junction point on your C-drive, named C:\sbtk. In essence it means that you have a dummy directory named c:\sbtk which actually points to the full directory C:\Data\Eclipse\sbtsdk-1.0.0.20131101-1513\sbtsdk. This is superhandy when setting up Eclipse Workspace later on.
Another ting initwin.cmd attempt to do is to unpack the Tomcat-server in the sbtk\tomcat subdirectory. On my machine I didn’t have any previous Java installations, and thus the unpacker didn’t exist. I therefore manually unzipped the tomcat-zip to the directory sbtsdk\tomcat\apache-tomcat-7.0.30 like this;![SNAGHTML94f855[4] SNAGHTML94f855[4]](http://www.proudprogrammer.no/web/ppblog.nsf/images/GANI-9DNENG/$File/SNAGHTML94f855%5B4%5D_thumb.png)
Note - if you upgrade SBT to a newer version, it is probably smart to delete the junction point first. - If you have installed Eclipse, fire it up.
One of the first questions from Eclipse is what workspace you would like to use;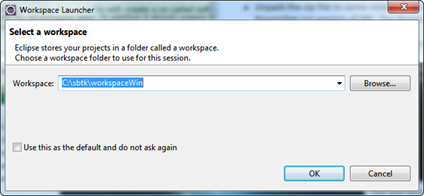
Choose C:\sbtk\workspaceWin.
Eclipse will now start and you’ll see a whole bunch of projects. Give Eclipse some time, as I checks the consistency and build the workspace. When it is finished, you will unfortunately see some errors (IBM, please fix this in future builds :-)).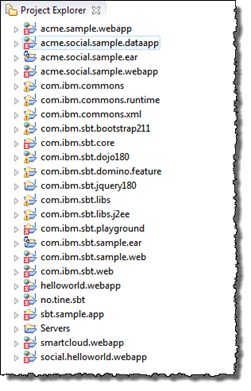
… and in the problems pane …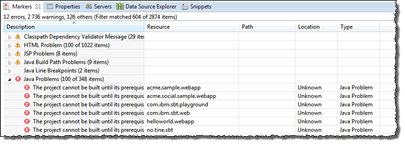
Most of the problems tend to go away by just fixing one single project named com.ibm.sbt.core. Open it up and navigate to the MANIFEST.FL file. Open it up and scroll down to the line with the error-marker, like shown below;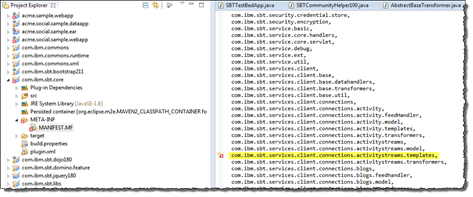
I have been able to fix the problem by just removing the line, and saving MANIFEST.FL again. To be sure Eclipse actually detects this and rebuild all other projects using the com.ibm.sbt.core project, choose Project -> Clean. That will show the dialog box below;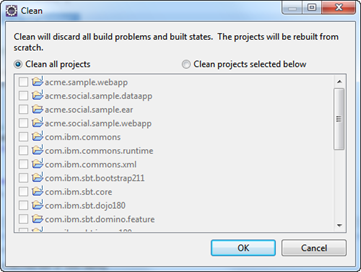
Eclipse now rebuilds the workspace and all involved projects. I also, just for the sake of it, restart Eclipse. It should look something like this when you have restarted (see, no errors!);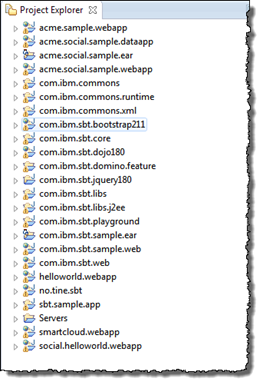
- Create a directory for the SBT jar runtime-files
All the projects above end up creating a bunch of jar files, which essentially are packages of runable java code. In order to have our LotusScript code work in the end, I will end up calling functions in these jar files. By collecting them to a single, and easy to remember, directory, you will have an easier time deploying them later on to the your Notes client and Domino server.
I create directory named c:\temp\sbt.
First copy all the files - but the playground-file, from directory C:\sbtk\redist\jar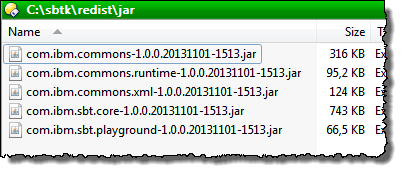
The copy all the files from the directory C:\sbtk\source\com.ibm.sbt.libs.java\lib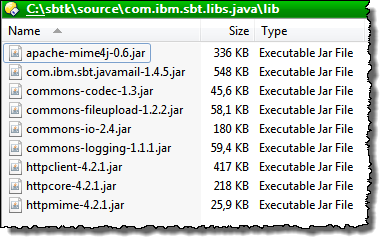
- Determine a directory name to use on your Domino server, based on the version of the SBT
From the SBT-version above, I find it natural to use the name sbt-v1.0.0.20131101. This name will be used when you very soon copy the files from c:\temp\sbt to the Domino server
By using different directories, you will make it easier in the future to upgrade the SBT-version. - Enable your Notes client and Designer to use SBT. Copy the files from the c:\temp\sbt to your Notes client jvm\lib\ext subdirectory
You probably want to make it possible to run your code in the context of the Notes client. This means that you can create local agents or other code-pieces that use the SBT-classes and jar files to communicate with Connections. This code will all run on your Notes client, and I very much like to get my client-context code working before attempting to getting the server-context code working. The server always add another level of complexity to the table.
On my machine the files from c:\temp\sbt are copied to the C:\Program Files (x86)\IBM\Lotus\Notes\jvm\lib\ext directory, like this (you see some of them below)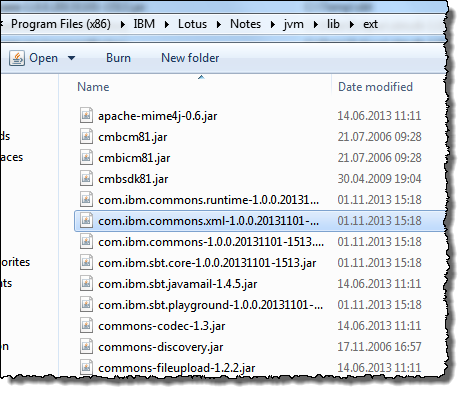
Be sure to restart your Notes client before continuing! - Enable your Domino server to use SBT. Copy the files from c:\temp\sbt to your Domino server’s file system
In the previous step, we just copied the files to the jvm\lib\ext subdirectory and that was good enough for the Notes client. I can then find any jar-file inside the jvm\lib\ext-directory at runtime.
We will soon copy the files to a similar directory, but unfortunately (but very nice security-wise!) the Domino server is a little more critical to just loading jar-files from this directory at runtime. We actually have to specify each file in the Notes.ini keyword JavaUserClassesExt on the server and restart the server. More on that in the next step.
But first. If you have a Windows Domino server, you would copy the c:\temp\sbt-files to the Domino server’s jvm\lib\ext\sbt-v1.0.0.20131101 directory (remember, this is where the directory name you created in the previous steps comes to play!).
On my Domino server the full directory-path is C:\IBM\Domino\jvm\lib\ext\sbt_v1.0.0.20131101.
If you have an IBM i machine, the directory would be something like /qibm/proddata/os400/java400/ext/sbt_v1.0.0.20131101 on your IBM i file system (BTW, I use the System i Navigator to both create the directory and to copy the files from my machine to the server by drag and drop). - Specify each jar-file in the Domino server’s Notes.ini JavaUserClassesExt keyword
The parameter is simply specified like this in the Notes.ini
JavaUserClassesExt=C:\IBM\Domino\jvm\lib\ext\sbt_v1.0.0.20131101\com.ibm.sbt.core-1.0.0.20131101-1513.jar,next file, next file
Each file must have it’s full path to the file. This quickly leads to a very long value for JavaUserClassesExt. The real challenge is that Domino has a fixed maximum length if 255 characters for any keyword in Notes.ini. Luckily we have a work-around for this. By specifying each file in a separate keyword, such as S0, S1, S2 etc, and then use those instead in JavaUserClassesExt …;
JavaUserClassesExt=S0,S1,S2
S0=C:\IBM\Domino\jvm\lib\ext\sbt_v1.0.0.20131101\com.ibm.sbt.core-1.0.0.20131101-1513.jar
S1=C:\IBM\Domino\jvm\lib\ext\sbt_v1.0.0.20131101\com.ibm.commons.xml-1.0.0.20131101-1513.jar
… we can stuff much more into JavaUserClassesExt. But remember, we still has the 255-character limit!
Luckily for you, I have made available a JavaUserClassesExtHelper-database, helping you a long way defining the JavaUserClassesExt keyword.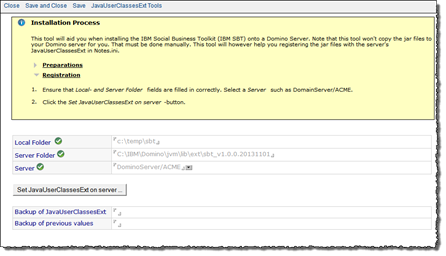
Simply specify the source directory (c:\temp\sbt) and the target directory on the server (C:\IBM\Domino\jvm\lib\ext\sbt_v1.0.0.20131101) along with the server name, and push the “Set JavaUserClassesExt on server…” button! The configuration on the server is automated from here. You even have some tools to see what the server’s JavaUserClassesExt keyword contains now, and you can choose to rename a code, delete it and show it’s usage: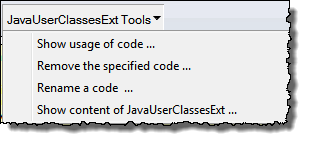
In the future it could of course be smart to attach all the files from the source directory, and have an agent detach the files directly onto the server. Haven’t gotten there yet!
Remember to restart the Domino server so it picks up the changes in the JavaUserClassesExt setting
To be continued in part 2.
