Part 5: Continuing with DXL to create the Gallery feature in the Icon and Images database
Tags: Lotus Notes Software DXL LotusScript
This is part 5 of a series of articles about the Icon and Images database (started in this article), This article focus on the Gallery pages and how it was made.
This is part 5 of a series of articles about the Icon and Images database (started in this article), This article focus on the Gallery pages and how it was made.
This is the fifth
article in the series covering the Icon and Images database. The previous
articles are;
Part 1: Icon and Images database -or- How I store more than 1.8 million icon files in a single Notes database
Part 2; Programming details on Icon and Images - Enumerating files
Part 3: Using DXL to create imagery in documents
Part 4: Using DXL to create imagery in documents - continued
If you don't know Icons and Images, please catch up with the previous articles!
In this article I'll cover the first of two new features in the database, the Gallery page, and how I made it. The pepper here is that the new features is direct reuse of the cool DXL techniques described especially in part 3 and 4.
The Gallery
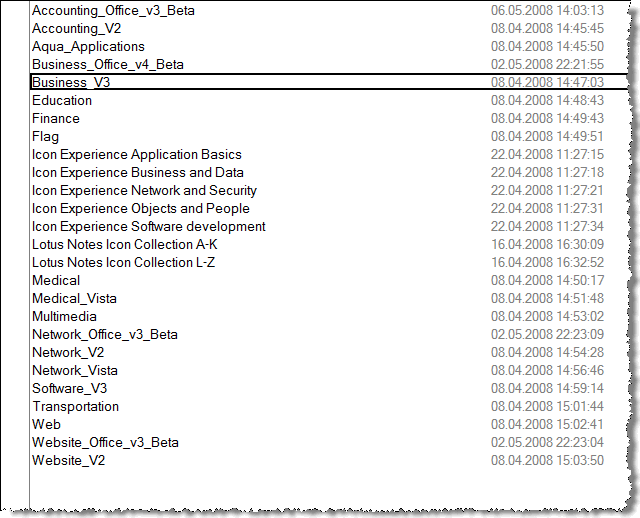
While the Icon and Images database offers quick access to icons and images, via standard Notes search and ordinary view categorization, I still felt that I could show the icons somewhat more "instant". So, why not create a Gallery. In my database, I have one or more gallery pages per icon library. So my Gallery-view in the database looks like this;
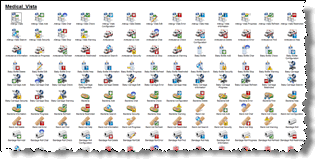
If I open a Gallery page, I see the full gallery, like this;
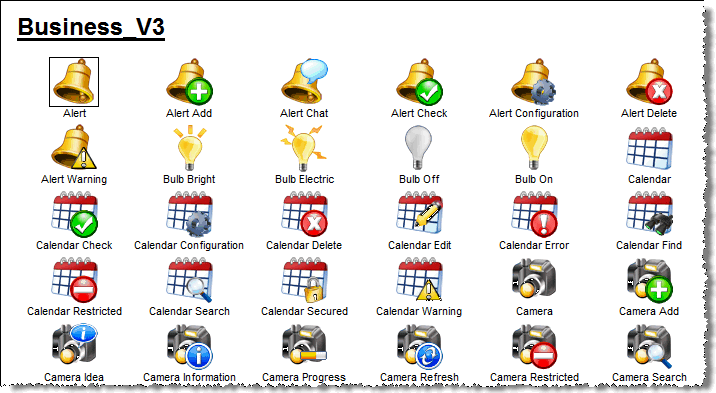
When the user clicks on an icon on a gallery page, he or she is quickly brought to the detailed icon page for that icon. Below I see the detail icon page for the topmost Alert-icon in the screenshot above;

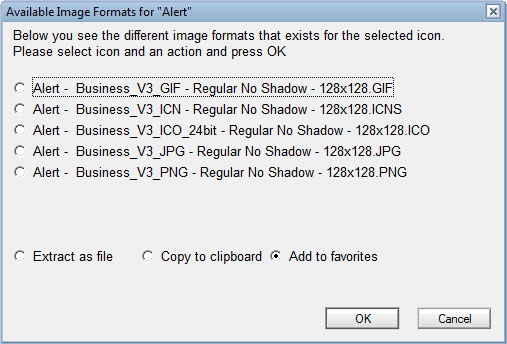
From the page above I can click on the icon to access the actions, like this;
In my view the Gallery page provide a quick and very visible way of locating the icons without needing to guess filenames!
How was the Gallery made?
If you have read part 3 and 4, you might recall that I pay special attention to all the GIF files for an icon. First and foremost because I use the GIF images as source for the icon imagery. But also for preparation for later gallery- and favorites production. I store the base64-encoded data in special Notes fields named "GalleryGIF???x???" fields, such as GalleryGIF128x128, GalleryGIF72x72 and so forth. The base64 data can be used directly when I programmatically create DXL files to import later. By already having the GIF images encoded like this, I speed up the gallery production enormously!
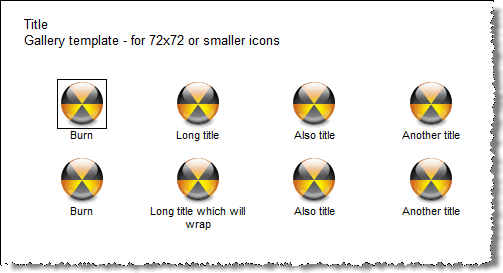
First create a dummy document and study the DXL. Before we dive into the details of the code, remember that I first create a dummy document containing the tables and default actions for some icons and then export that as DXL This because I want Notes to tell me how it wants the DXL to be formatted and structured. The same logic for the gallery, where you see my initial dummy document for 13 cells per row table;
The outputted DXL from Notes reveals how this table should be built programmatically
Then use the CreateGallery in the Gallery And Favorites Processing script library.
The outline of the CreateGallery are as follows;
Get the DXL templates. Recall from part 3 and 4 how I use code templates to hold the different DXL parts I need to build the DXL programmatically? The code below retrieves the DXL templates for the different parts;
' And set those template variables above for a table with 13 icons 48x48
Call SetDXLTemplatesForGallery48x48(strDXLTemplateDocumentPrefix, _
strDXLTemplateTablePrefix, _
strDXLTemplateImageTableCell,_
strDXLTemplateEmptyTableCell,_
strDXLTemplateDocumentSuffix)
The templates will later be used when I output line by line to my resulting DXL file, which later will be imported.
For each icon in the selection or view, add it to a gallery document. . If the gallery document already exist, I add the icon to it, or otherwise I dynamically create a new gallery document. This is all standard LotusScript where I lookup potential existing gallery documents. The code uses the templates from the previous step intensively, such as;
' Output the initial DXL Document header stuff
iParCountPerDoc = 2
iIConPerRowCount = 0
Kill strDXLFileName
Open strDXLFileName For Output As fout
strTmp = strDXLTemplateDocumentPrefix
strTmp = Replace(strTmp, "$(REPLICAID)",db.ReplicaID)
strTmp = Replace(strTmp, "$(NOTEID)",docGallery.NoteID)
strTmp = Replace(strTmp, "$(UNID)",docGallery.UniversalID)
strTmp = Replace(strTmp, "$(TITLE)", strCurrentLibrary)
Print #fout,strTmp
In the code above I first open the strDXLFileName for output, then I grab the template string strDXLTemplateDocumentPrefix to my local string strTmp. Since most templates contain variables, I replace them with actual content with the Replace-function. Finally I output the modified strTmp to the strDXLFileName, thus building up the resulting DXL line by line.
Add the existing base64 encoded data to the DXL. This step actually grabs the GIF file in its encoded base64 format, and stuff it into the DXL. The code below do this for all sizes I want;
Forall strSize In listB64FieldSeq
' Ensure I start at the desired level in the sequnece list, 48x48 in this case!
If Cint(Listtag(strSize)) >= 4 Then
strFieldName = "GalleryGIF" & strSize
If docIcon.HasItem(strFieldName) Then
Set item = docIcon.GetFirstItem(strFieldName)
vRc = Split(strSize, "x")
strTmp = Replace(strTmp, "$(IMGSIZE)",vRc(0)) ' Ensure we've got the correct size!
strTmp = Replace(strTmp, "$(BASE64)",item.Text)
Exit Forall
End If
End If
End Forall
Print #fout,strTmp
The strTmp-string above contains the template for the icon-element itself. Remember the GalleryGIF???x??? fields? The code above checks that the icon document actually has such as field and that it is of correct size. If so, I just fill in the variables $(BASE64) and $(IMGSIZE) in strTmp with the actual content. The last line in the snippet above output the icon-element directly to the resulting DXL file.
Ensure that the tablecells are filled, either with icon data or with "empty cell" data. Remember that DXL don't want too much guess work, so you must ensure that you have completely valid DXL tables. This means that if I have 13 cells per row, and only 10 icons, I must add DXL code for 3 "empty" tablecells to get a complete 13-cell tablerow.
Import the DXL. Just as for the icon imagery in the icon documents themselves, I use a very simple function to import the DXL file I have programmatically generated. I refer to part 4 for details of this function. Remember to use the NotesDXLImport's Log-property to check for potential errors.
The complete CreateGallery-function is mere 233 lines of code, which probably have further optimizing potential.
Part 1: Icon and Images database -or- How I store more than 1.8 million icon files in a single Notes database
Part 2; Programming details on Icon and Images - Enumerating files
Part 3: Using DXL to create imagery in documents
Part 4: Using DXL to create imagery in documents - continued
If you don't know Icons and Images, please catch up with the previous articles!
In this article I'll cover the first of two new features in the database, the Gallery page, and how I made it. The pepper here is that the new features is direct reuse of the cool DXL techniques described especially in part 3 and 4.
The Gallery
While the Icon and Images database offers quick access to icons and images, via standard Notes search and ordinary view categorization, I still felt that I could show the icons somewhat more "instant". So, why not create a Gallery. In my database, I have one or more gallery pages per icon library. So my Gallery-view in the database looks like this;
If I open a Gallery page, I see the full gallery, like this;
When the user clicks on an icon on a gallery page, he or she is quickly brought to the detailed icon page for that icon. Below I see the detail icon page for the topmost Alert-icon in the screenshot above;
From the page above I can click on the icon to access the actions, like this;
In my view the Gallery page provide a quick and very visible way of locating the icons without needing to guess filenames!
How was the Gallery made?
If you have read part 3 and 4, you might recall that I pay special attention to all the GIF files for an icon. First and foremost because I use the GIF images as source for the icon imagery. But also for preparation for later gallery- and favorites production. I store the base64-encoded data in special Notes fields named "GalleryGIF???x???" fields, such as GalleryGIF128x128, GalleryGIF72x72 and so forth. The base64 data can be used directly when I programmatically create DXL files to import later. By already having the GIF images encoded like this, I speed up the gallery production enormously!
First create a dummy document and study the DXL. Before we dive into the details of the code, remember that I first create a dummy document containing the tables and default actions for some icons and then export that as DXL This because I want Notes to tell me how it wants the DXL to be formatted and structured. The same logic for the gallery, where you see my initial dummy document for 13 cells per row table;
The outputted DXL from Notes reveals how this table should be built programmatically
Then use the CreateGallery in the Gallery And Favorites Processing script library.
The outline of the CreateGallery are as follows;
Get the DXL templates. Recall from part 3 and 4 how I use code templates to hold the different DXL parts I need to build the DXL programmatically? The code below retrieves the DXL templates for the different parts;
' And set those template variables above for a table with 13 icons 48x48
Call SetDXLTemplatesForGallery48x48(strDXLTemplateDocumentPrefix, _
strDXLTemplateTablePrefix, _
strDXLTemplateImageTableCell,_
strDXLTemplateEmptyTableCell,_
strDXLTemplateDocumentSuffix)
The templates will later be used when I output line by line to my resulting DXL file, which later will be imported.
For each icon in the selection or view, add it to a gallery document. . If the gallery document already exist, I add the icon to it, or otherwise I dynamically create a new gallery document. This is all standard LotusScript where I lookup potential existing gallery documents. The code uses the templates from the previous step intensively, such as;
' Output the initial DXL Document header stuff
iParCountPerDoc = 2
iIConPerRowCount = 0
Kill strDXLFileName
Open strDXLFileName For Output As fout
strTmp = strDXLTemplateDocumentPrefix
strTmp = Replace(strTmp, "$(REPLICAID)",db.ReplicaID)
strTmp = Replace(strTmp, "$(NOTEID)",docGallery.NoteID)
strTmp = Replace(strTmp, "$(UNID)",docGallery.UniversalID)
strTmp = Replace(strTmp, "$(TITLE)", strCurrentLibrary)
Print #fout,strTmp
In the code above I first open the strDXLFileName for output, then I grab the template string strDXLTemplateDocumentPrefix to my local string strTmp. Since most templates contain variables, I replace them with actual content with the Replace-function. Finally I output the modified strTmp to the strDXLFileName, thus building up the resulting DXL line by line.
Add the existing base64 encoded data to the DXL. This step actually grabs the GIF file in its encoded base64 format, and stuff it into the DXL. The code below do this for all sizes I want;
Forall strSize In listB64FieldSeq
' Ensure I start at the desired level in the sequnece list, 48x48 in this case!
If Cint(Listtag(strSize)) >= 4 Then
strFieldName = "GalleryGIF" & strSize
If docIcon.HasItem(strFieldName) Then
Set item = docIcon.GetFirstItem(strFieldName)
vRc = Split(strSize, "x")
strTmp = Replace(strTmp, "$(IMGSIZE)",vRc(0)) ' Ensure we've got the correct size!
strTmp = Replace(strTmp, "$(BASE64)",item.Text)
Exit Forall
End If
End If
End Forall
Print #fout,strTmp
The strTmp-string above contains the template for the icon-element itself. Remember the GalleryGIF???x??? fields? The code above checks that the icon document actually has such as field and that it is of correct size. If so, I just fill in the variables $(BASE64) and $(IMGSIZE) in strTmp with the actual content. The last line in the snippet above output the icon-element directly to the resulting DXL file.
Ensure that the tablecells are filled, either with icon data or with "empty cell" data. Remember that DXL don't want too much guess work, so you must ensure that you have completely valid DXL tables. This means that if I have 13 cells per row, and only 10 icons, I must add DXL code for 3 "empty" tablecells to get a complete 13-cell tablerow.
Import the DXL. Just as for the icon imagery in the icon documents themselves, I use a very simple function to import the DXL file I have programmatically generated. I refer to part 4 for details of this function. Remember to use the NotesDXLImport's Log-property to check for potential errors.
The complete CreateGallery-function is mere 233 lines of code, which probably have further optimizing potential.
| Permalink | ![]()
![]()
![]()